Web Studio Quick Start
Web Studio ⎋ is Codecraft Works’ online code editor for building web projects with HTML, CSS, and JavaScript. You write code on one side of the screen and see your page come to life on the other, right in your browser, with nothing to install.
Signing In
Go to studio.codecraftworks.com ⎋ and select Sign in in the upper right corner. You can browse community projects without signing in, but you need to sign in to create, save, or clone a project. Read How to Sign In to Web Studio for all of the sign-in options.
The Gallery
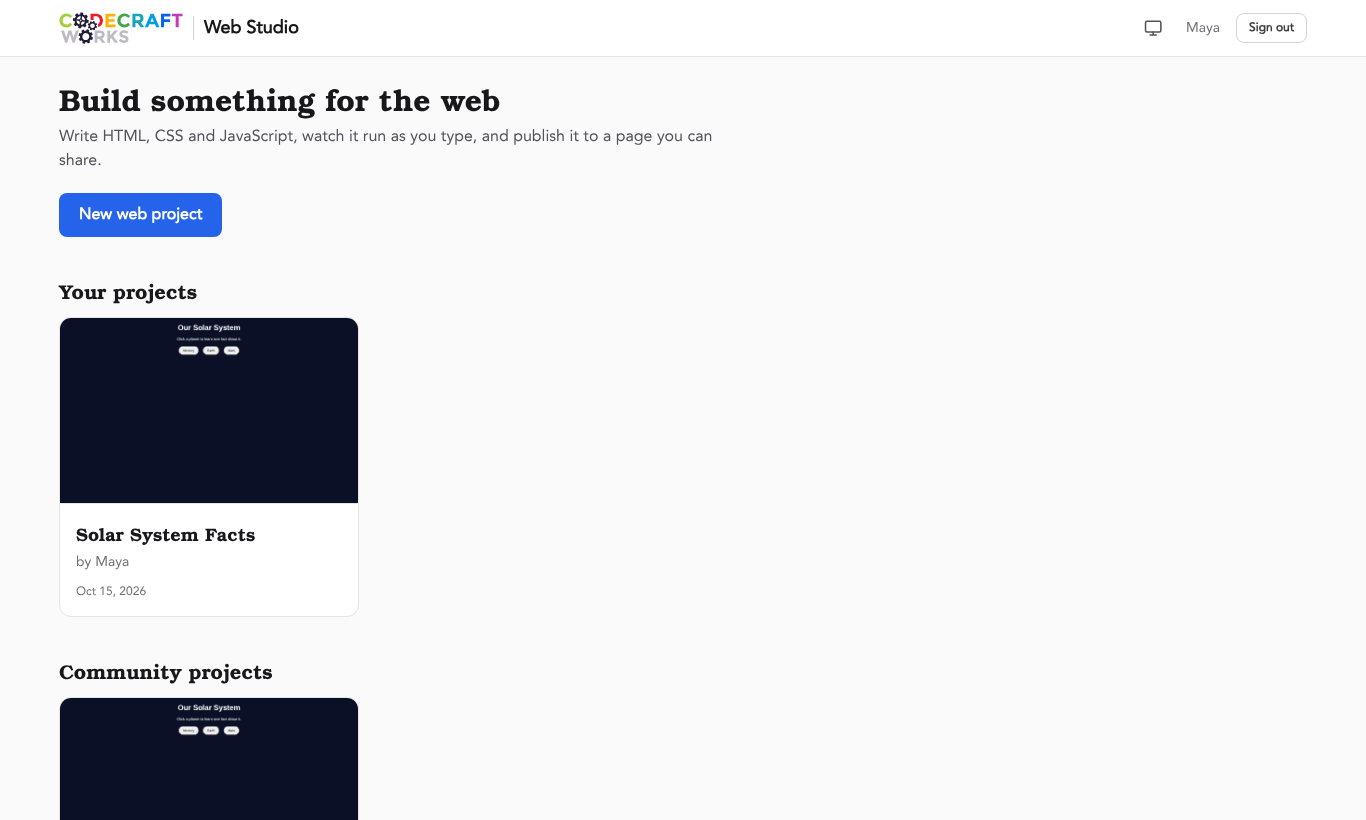
The Web Studio home page is the gallery. From here you can:
- Start a project with the New web project button.
- Open one of Your projects, which lists every project you have made, public or private.
- Browse Featured projects and Community projects, which are public projects made by other Codecraft students.
The Editor
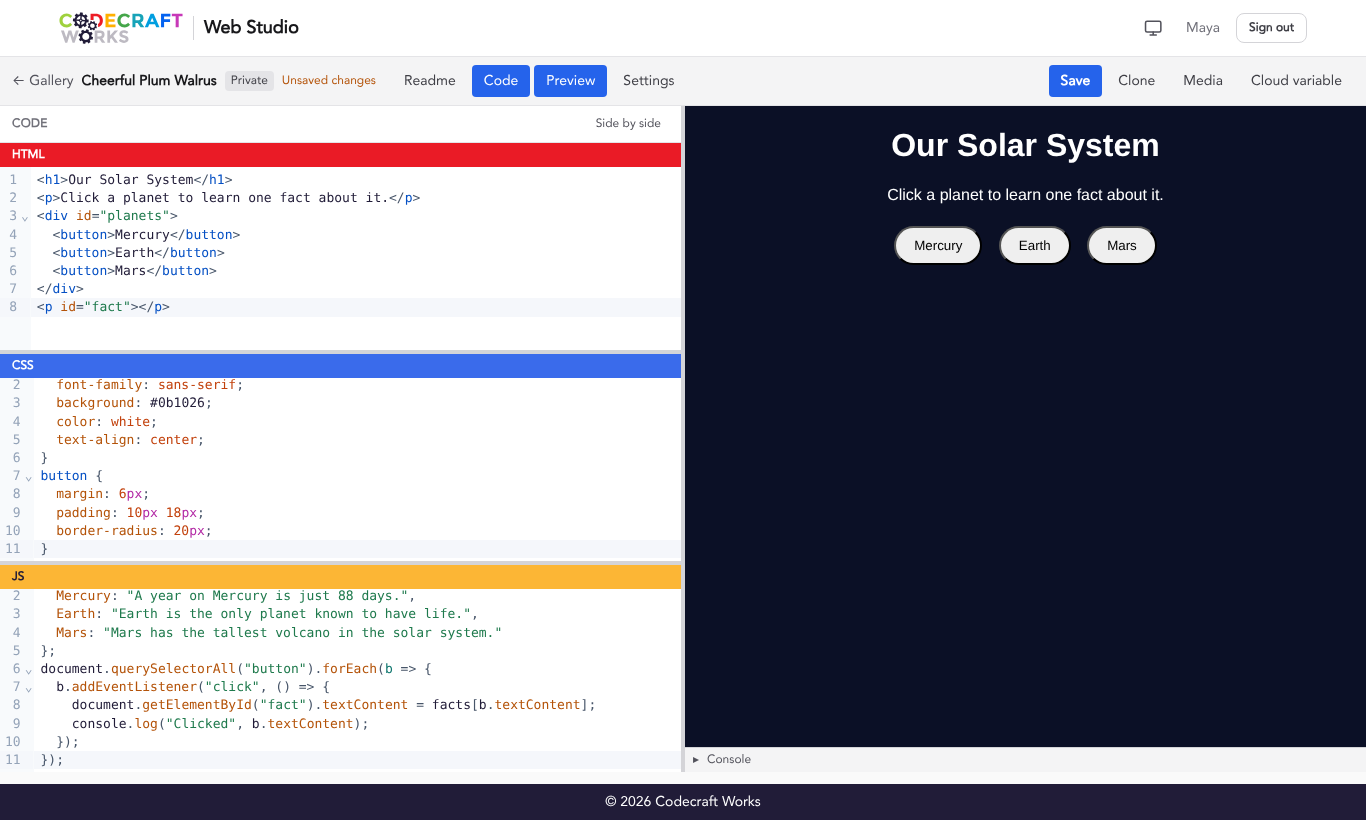
When you open a project, you will see the project toolbar at the top, the code editor on the left, and a live preview of your page on the right.
Code
The code editor has three panes, one each for HTML, CSS, and JS (JavaScript). Drag the bar between panes to resize them. Use the Side by side / Stacked button at the top of the code editor to switch how the panes are arranged.
Live Preview
The preview updates as you type, so there is no Run button. If your JavaScript gets stuck in a loop that runs too long, Web Studio pauses it and shows a message. Fix the loop, then select Resume JS in the JS pane.
Console
Under the preview is the Console. It starts closed; click the Console bar to open it. Anything your project logs with console.log() shows up here, along with any errors. You can also type a JavaScript expression in the “Run an expression…” box and press Enter to run it against your page. If your project has errors while the console is closed, a red error count appears on the bar.
Saving
Web Studio does not save automatically. Select Save in the toolbar, or press Ctrl+S (Windows/Chromebook) or Command+S (Mac). When you see “Unsaved changes” next to the project name, you have work that hasn’t been saved yet. If you try to leave the page with unsaved changes, your browser will ask you to confirm.
The Toolbar
The toggles on the left of the toolbar show and hide parts of the screen:
- Readme shows the project’s README, a description of the project written by its creator.
- Code shows the HTML, CSS, and JS panes.
- Preview shows the live preview and console.
- Settings opens the project’s settings, where you can rename it, make it public or private, write its README, or delete it.
The buttons on the right of the toolbar let you work with the project:
- Save saves your code. Only people who can edit the project see this button.
- Clone makes your own copy of the project. See How to Clone a Web Project.
- Media uploads images, audio, and video. See How to Add Media to Web Projects.
- Cloud variable stores a small piece of data with your project. Only the project’s owner sees this button.
- Share gives you links to share your project. It only appears when the project is public. See How to Create and Use Share Links.
On a small screen, like a phone, Web Studio shows one part of the screen at a time. Use the toggles to switch between them.
For a full description of every button and setting, read Web Studio Editor Reference.
Keyboard Shortcuts
| Shortcut | What it does |
|---|---|
| Ctrl+S / Command+S | Save the project |
| Ctrl+1 | Jump to the HTML pane |
| Ctrl+2 | Jump to the CSS pane |
| Ctrl+3 | Jump to the JS pane |
| Ctrl+F / Command+F | Search in the current pane |
| Escape | Close a pop-up, or move from the code back to the toolbar |
Related articles
- How to Sign In to Web Studio
- How to Create a New Web Project
- How to Add Media to Web Projects
- How to Create and Use Share Links
- How to Create a Readme in Your Project